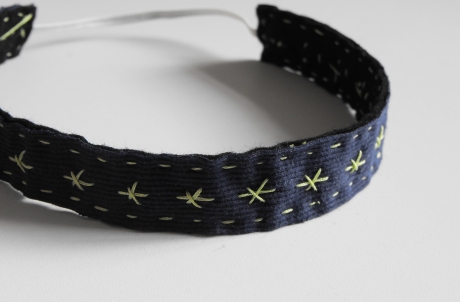
 So, remember those £21 headbands? No way were they ever going to make it into my shop at that price, so here’s a free tutorial. If you have a few basics in your sewing box, they don’t have to cost you a penny, and there’s no adhesive necessary! Enjoy :)
- measurements are for an adult size bando, you may need to trim a few cm off to adapt it for a child
- an old t-shirt/other plain scrap fabric
- a length of felt
- elastic
- fabric scissors
- pins
- embroidery thread & needle
- measuring tape
- fabric chalk/marker
 On your felt fabric, mark out a strip which is 39cm (15.5 in) by 2.5cm (1in) using your fabric marker or chalk. Cut out with your fabric scissors.
 Pin the felt strip onto your jersey or scrap fabric, making sure the whole strip fits on. Cut around the felt so you now have 2 strips of fabric.
 Cut 15cm (6in) of elastic and tuck it in between the two layers of fabric on one of the short ends. Make sure to tuck it in about 2cm. Begin a running stitch from the corner as shown (hiding your knot or anchor stitches between the two fabric layers). When you reach the elastic, make three cross stitches as shown (making sure to go through all 3 layers), making three diagonal stitches going up to where the elastic ends inside the band (use your fingers to feel where it is), and crossing them to get back to the edge. Continue a running stitch along this short edge and then the long edge.
When you reach the opposite short edge, tuck the other end of the elastic into the band and stitch in place as before. Running stitch the remaining edges.
 Now to decorate the band; you can use any embroidery stitch you like (in fact this is a good excuse to try a new one!). I chose to work Ermine stitches in a line repeat over the band, which is worked as follows (see pictures): bring needle up at 1, down at 2, up at 3
 Down at 6, up at new position 1.
 Continue to the end of the band and fasten off. And you’re done! If you’re so inclined, you can make the band broader, thinner, patchwork, quilted, beaded… anything you like really, just using these basic measurements. If you take your time they’ll be a lot neater than mine :D
P.S., A message from Dinah, who is purring and stomping across my keyboard: “n mmmmmmmmmmmmmnb mmmmmmmmm”
I think that says it all, really.


